Home »
Dolls House Guides » Building and Decorating a Dolls House
Building and Decorating a Dolls House
Using Realistic Brick Compound and Stencils
Introduction
This is a step-by-step guide to creating realistic brick and
stone finishes using Realistic Brick Compound and Stencils. The
basic principle is very simple and not unlike other types of
decorative stenciling. The only real difference is that instead of
using paint you will be applying Realistic Brick Compound which
produces the authentic look and feel of real bricks or stone. The
material is very versatile so with a little experience users can
develop their technique and create their own unique finished
effects.
Realistic
Brick Compound is a very easy material to work with. The key to its
ease of use is the air drying quality of the compound as it allows
unlimited working time so there's no need to rush and very little
material is wasted. If you do make a mistake or get in a mess
there's no need to worry - simply scrape the compound off and wipe
the wall surface clean with a damp cloth, then re-apply. After application the
compound will dry and set hard after about an hour or so, but it can
still be cleaned off if required by first re-wetting it. When the
house is finished and you are completely happy with the application,
the compound should be sealed with a clear matt varnish which will
make it permanent and waterproof as well as enhancing the finished
colour.
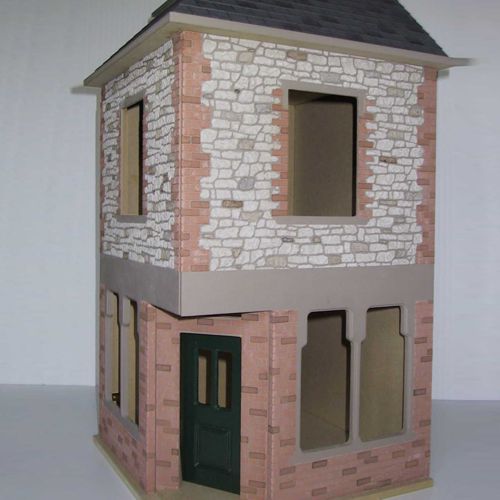
Building and Decorating a Typical Dolls House Kit
The dolls house featured here is the Main Street Corner Shop
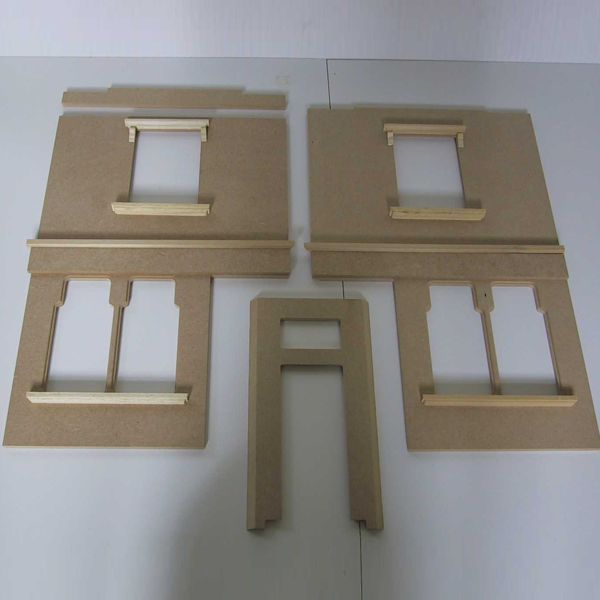
(1:12 scale) which is a typical MDF dolls house kit. This house is relatively
small and can easily be finished with one bag of Realistic Brick
Compound and one stencil (unless you choose to combine other colours
and patterns as we are doing here).
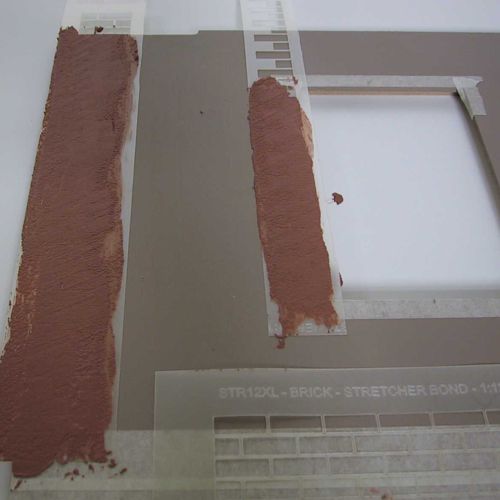
Undcorated Dolls House Kit
Completed Dolls House Kit with Decorated Exterior
Unpainted Dolls House Parts
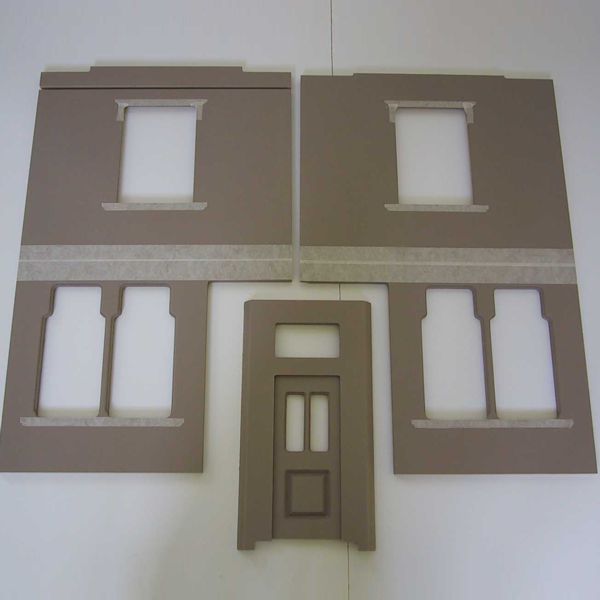
Dolls House Parts after Painting and Masking.
The next stage is to prepare the Realistic Brick / Stone stencil
ready for use. Spray the back of the stencil thoroughly with a
low-tack stencil adhesive and allow it to dry for a few minutes.
When using a new stencil second coat of adhesive is recommended. The
stencil should feel tacky to touch, but the adhesive should not come
off on your fingers, if it does you should leave it to dry for a
little longer. The stencil should remain tacky for several hours of
repeated use, but
when necessary it should be lightly re-sprayed with adhesive. This is very
important to achieve good results, otherwise when the Realistic
Brick Compound is applied it may bleed underneath the stencil.
Prepare some Realistic Brick Compound by gradually adding water and mixing
until it reaches a smooth easily spreadable consistency - it should
be a soft smooth paste, but not runny. The consistency is not absolutely
critical, but it does affect the ease of use. The realistic brick
compound mix will remain workable all the while it is kept moist so
if it starts to dry after a while simply add more water to extend
the working time. This makes the material very easy to work with as
you can work at your own pace without rushing. Also, it is very easy
to clean up and to rectify any mistakes.
Position the stencil on the wall of the house so that the bricks
are correctly aligned with the edges of the wall and press it down
firmly ensuring all areas are in contact with the wall.
Spread the
compound mix over the stencil ensuring it is all covered then use a
pallet knife to remove the surplus compound to the level of the
stencil. The technique is similar to icing a cake so I am told. Once
it is smooth and level carefully remove the stencil to reveal the
bricks (there's no need to wait for the compound to dry).
Note that the compound can be left a little thicker and rougher if
required depending on the desired finished effect.
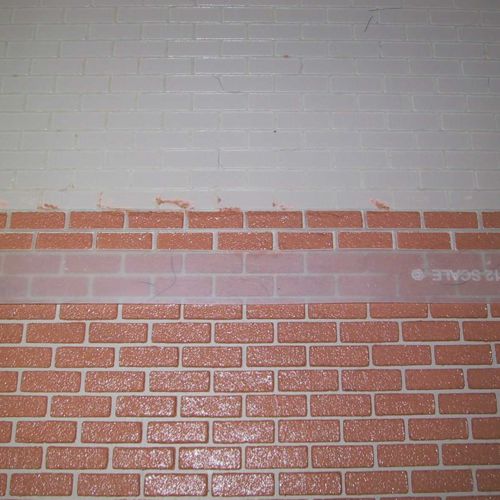
Remove the stencil to reveal the brick effect.
Clean-Up The stencil should now be rinsed in clean water and dried by
pressing between two dry cloths on a flat surface. The stencil adhesive
is not water-soluble so the stencil should remain tacky after
washing and drying.
The application can now be continued by applying the stencil to the
wall next to the bricks which were previously applied and
overlapping one or two courses - this will ensure that the bricks
remain in alignment and there will be no visible joins. The compound
can now be applied as before up to the edge of the bricks already
applied, and the stencil removed to reveal the continued bricks. The
whole process is repeated over and over until the whole wall is
covered. Extra large stencils are available as an option to
speed up the application process.
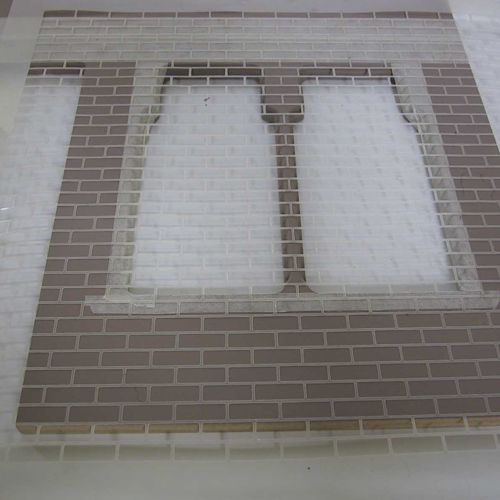
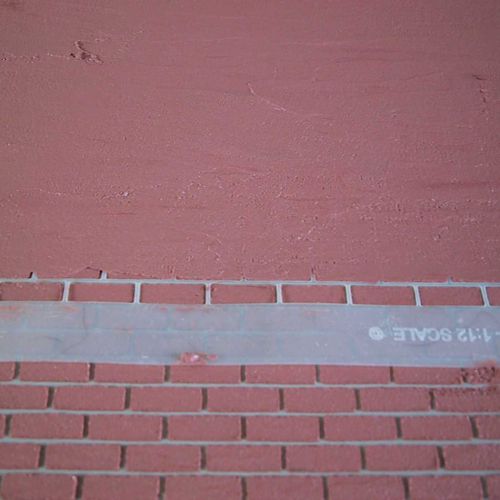
Brick stencil positioned on wall
Apply compound and smooth out evenly
A layer of red brick compound was then applied over the stencil and spread
smoothly over the wall area.. .
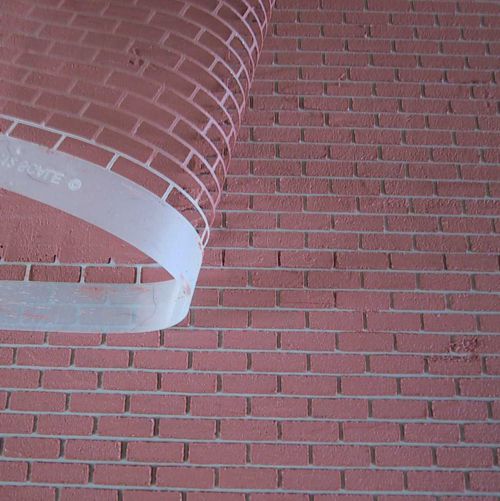
Continuation of brick
application by overlapping stencil
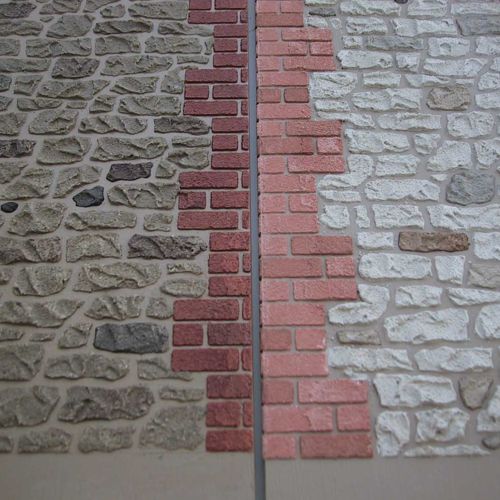
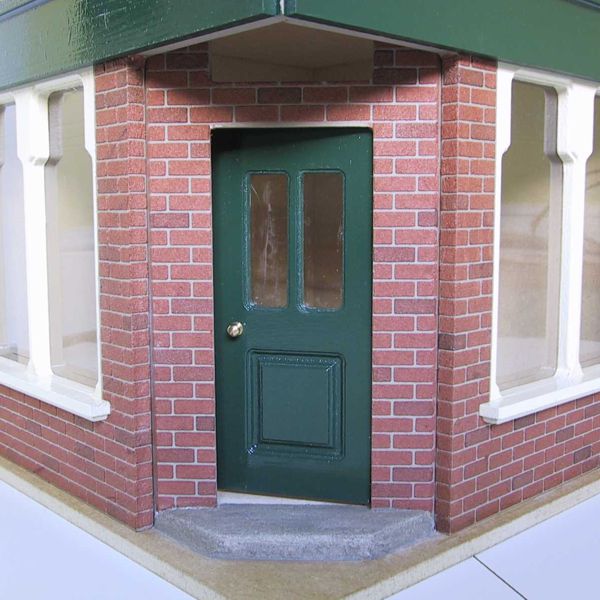
The edges of panels are finished in a similar way, but it is
important to ensure that the stencil is correctly aligned at the
corners so the compound joins creating the effect of whole bricks.
Here you can see the stencil being peeled away to reveal the brick finish. Note that there is
no need to allow the compound to dry between application stages.
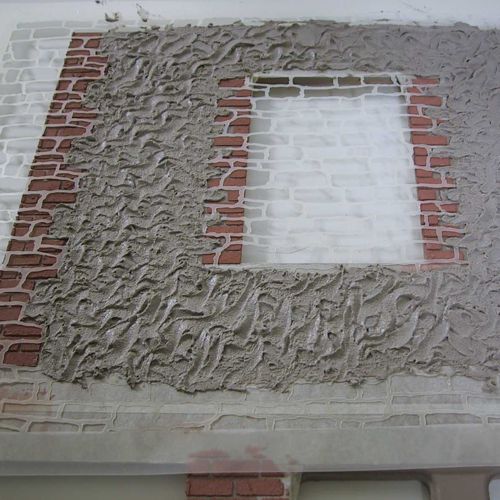
Quoin stencils positioned on wall
Apply compound and smooth out evenly
Remove the stencil to reveal the Quoins
The stone finish is applied here using Grey compound and a Rough
Stone stencil. The technique is similar to applying the brick finish
except that the compound is applied slightly thicker and the surface
is made uneven using the pallet knife to create a more authentic
rough face on the stones. Although the stone pattern appears random,
there is a repeat in the stencil pattern which allows it to be
continued without any visible joins.
Rough stone stencil positioned on wall
Apply compound to cover the surface spread unevenly if you wish to create an uneven texture on the face of the stones
Remove the stencil to reveal the stone finish
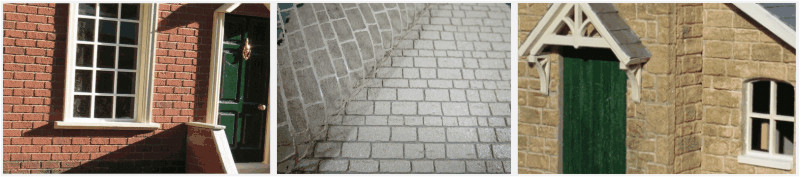
Finish shaded with acrylic paints
This photo shows the wiring used to power two wall lights and several
flickering LED's in the fireplace and chimney. These lights create a
lovely warm flickering glow in the room box. With hindsight we should
have routed the wires inside the box to give a neater finish. For
wiring instructions see our
dolls
house lighting guide.
To finish off we recommend sealing the finish by applying a coat of clear
matt varnish. This will add water resistance and strength to the
brick compound finish and also
enhance the colour.
Many varnish types are suitable, but we strongly advise testing on a
small sample before use as results can vary. We have found that
solvent based varnishes usually produce deeper finished colours than
acrylic ones. Care should be taken when applying acrylic varnishes
as these can soften the realistic brick compound finish during
application so re-brushing wet areas excessively could damage the
finish.
We currently recommend Polyvine Dead Flat Decorators Varnish as this produces
good results and is available to order on our website.
Finished stone & brick quoins
The finished decorated dolls house
Materials Used (available from Bromley Craft Products)
Realistic
Brick Compound - Red & Grey colours. Each bag will cover an area of
0.5 square metre approx.
Realistic Brick & Stone stencils - STR12,
RST12, QS12A, QS12B
One stencil is usually sufficient as they are
re-useable.
Pallet Knife
Clear matt varnish - Clear Matt Varnish Polyvine Dead Flat Decorators Varnish or other compatible varnish. Low tack Repositionable
stencil adhesive spray - Craftmount / Stick & Spray or similar.
Other Materials: Matt Emulsion paint for mortar colour-
small sample pots from DIY stores are ideal. Masking tape.
Click links below for more information...