Home »
Dolls House Projects » Cottage Garden Project
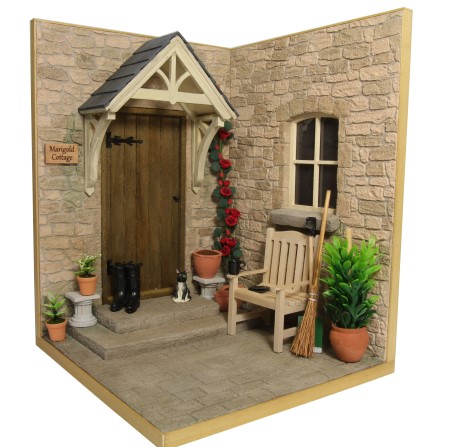
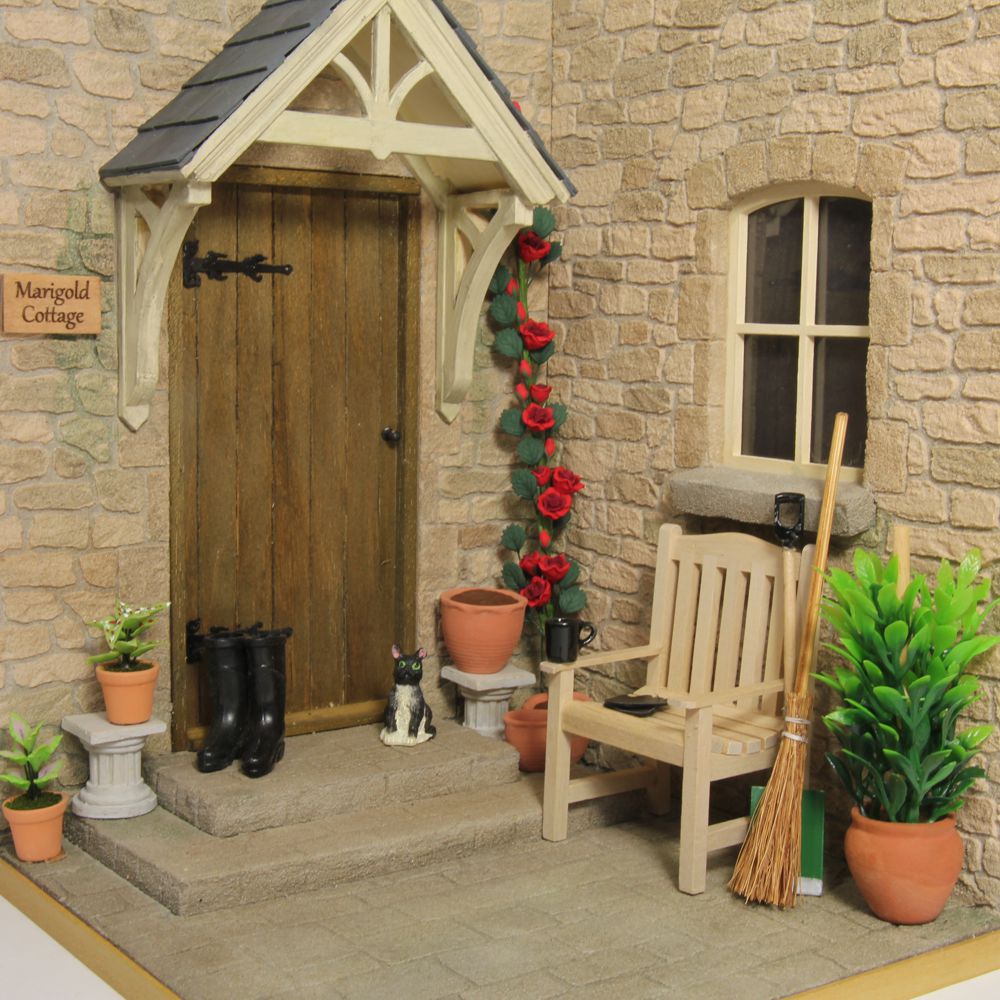
Dolls House Cottage Garden
Project review by Bromley Craft Products
See how we built the cottage garden kit and transformed it into a realistic stone finished model
This step-by-step guide shows the method of applying two layers
of Realistic Brick Compound, one for the mortar colour and one for
the stone finish. Usually we only apply a single layer of
compound so the painted background is visible in the mortar joints,
but adding a layer of compound for the mortar provides a more
realistic effect. We recommend using this method when the best
close-up detailed finish is required.
Step-by-Step Guide to Creating Realistic Stone Finish with
Realistic Mortar Joints
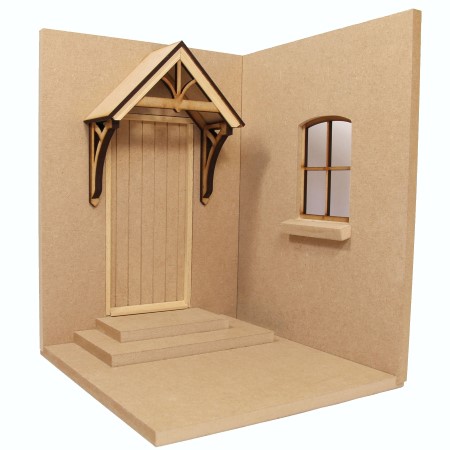
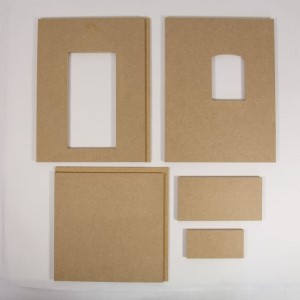
The dolls house cottage garden kit consists of precision cut MDF parts and
wooden mouldings. An optional decorating kit is available which
includes many of the materials shown here which can be used to create the
realistic finishes shown. This kit can be purchased from our website
- for details
click
here>>
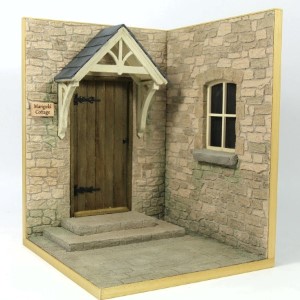
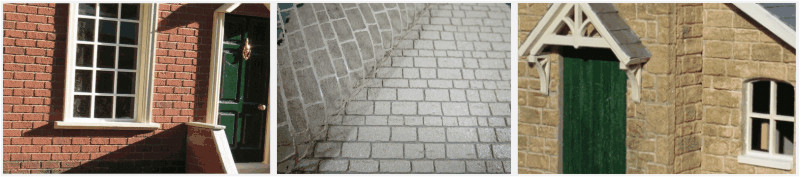
The photo above shows the cottage garden kit with realistic stone walls and
paving. Step-by-step photos below show how this finish was created
using Realistic Brick Compound etc.
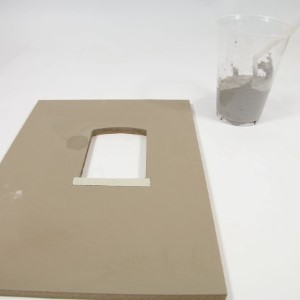
Photo shows the MDF walls, base and steps. These are the parts which will
have realistic brick / stone finish applied.
We recommend assembling these parts dry (without glue) to familiarise
yourself with how they fit together and to see where the stone finish needs
to be applied.
The parts should be primed / painted before applying the brick compound
finish. Matt emulsion paint is recommended.
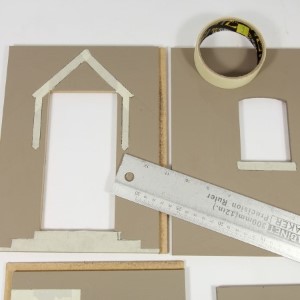
Here we have applied masking tape to parts where we don't want to apply the
brick compound such as where the porch fits etc.. This will be
removed after the compound is applied.
We have mixed some grey / neutral compound ready to apply as a mortar base
coat. It should be a smooth easily spreadable consistency, but not
runny. If in doubt we recommend trying test / practice applications before
applying to the kit.
Usually this painted finish serves as the mortar colour visible between the
stones, but for this project we are applying a layer of grey compound for
more realistic mortar joints. The mortar compound layer should be spread as thinly and smoothly as
possible.
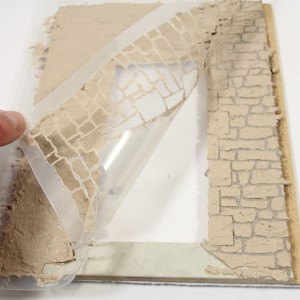
Immediately after applying the mortar compound, whilst it is still wet,
position the stone stencil and press gently into the compound to ensure
contact.
Apply the buff stone compound over the stencil. Note that we have
left the surface fairly rough and uneven to give the stone finish an
authentic look.
Peel away the stencil to reveal the stone finish. Note that there is
no need to allow the compound to dry between application stages.
Repeat the same process for the other wall and paving.
When dry any untidy edges can be cleaned up by scraping away any
surplus compound. Lightly sanding the compound will improve the
appearance of the finish.
Remove the masking tape to expose surfaces where porch etc. are fitted.
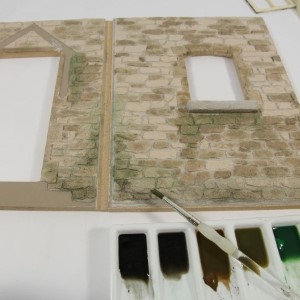
Here we are applying acrylic paints to create varied stone colours and a
weathered appearance. The colours appear stronger at this stage but
will be more subtle when dry and after varnishing.
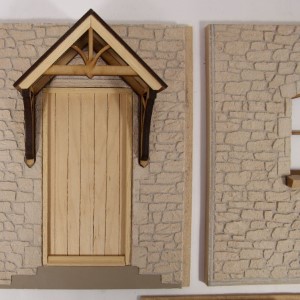
At this stage the parts can be glued together using PVA wood glue.
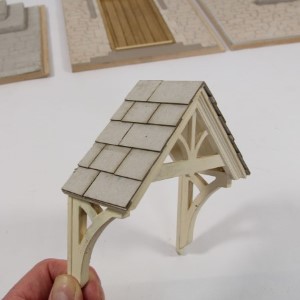
The porch roof is tiled using card tile strips. Wooden parts were
painted with Crafters Acrylic Antique White acrylic paint.
Roof tiling complete. Note the tile-and-a-half tiles on alternate
rows.
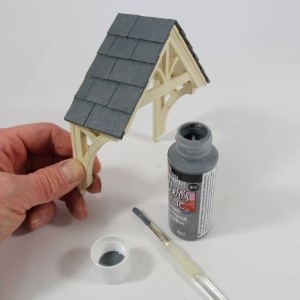
The roof tiles are painted using Crafters Acrylic Slate paint.
When dry shading can be added.
The final parts are glued into position and the whole model is varnished
using clear matt varnish which provides protection and enhances the
finished colours.
The dolls house cottage garden kit consists of precision cut MDF parts and
wooden mouldings. An optional decorating kit is available which
includes many of the materials shown here which can be used to create the
realistic finishes shown. This kit can be purchased from our website
- for details
click
here>>
To view a more detailed application guide
click here.
To view various projects and magazine features
click here.
To view more photos
click here or view our flickr page
here. If
you have viewed all the information on the website and
still have questions please
contact us.
Click links below for more information...